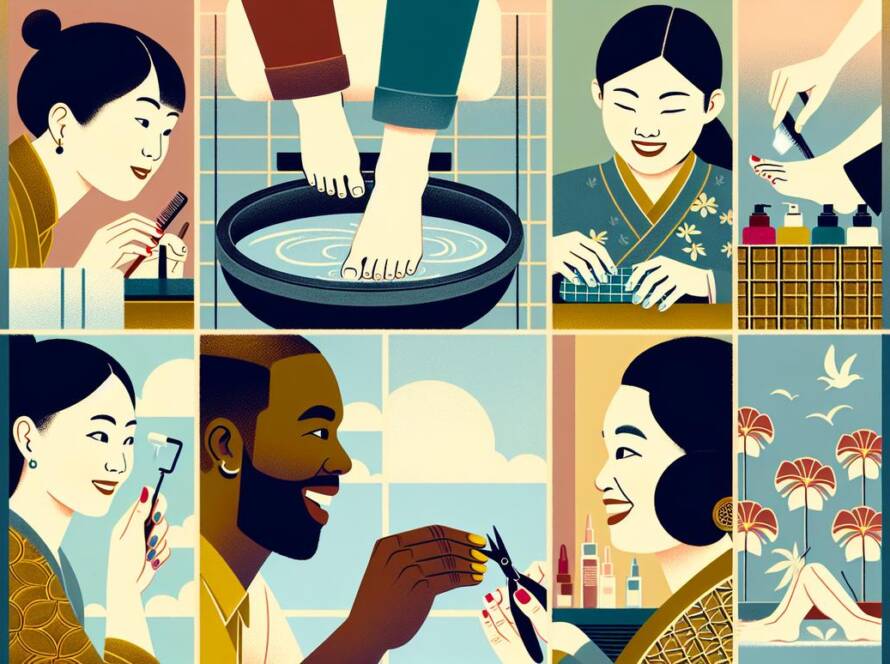
The Ultimate At-Home Pedicure: A Podiatry-Informed Guide for Healthy Feet
Table of Contents
- Why foot care matters for comfort and mobility
- Tools and product choices and sustainable alternatives
- Pre-pedicure prep: soak, exfoliate, and assess
- Nail shaping and gentle cuticle care
- Polish application and long-wear finishing tips
- At-home maintenance: weekly and monthly schedules
- Troubleshooting common foot concerns: dryness, ingrown nails, fungus
- When to consult a health professional
- Eco-conscious disposal and product selection
- Quick recap and a printable pedicure checklist
A great pedicure is more than just a cosmetic treat; it is a fundamental practice for foot health and overall well-being. While a salon visit is a wonderful indulgence, learning to perform a safe and effective at-home pedicure empowers you to maintain healthy, comfortable feet on your own schedule. This comprehensive guide walks you through a podiatry-informed routine, blending best practices for foot health with simple, eco-friendly swaps. Forget quick fixes and embrace a mindful approach to foot care that will keep you moving comfortably and confidently.
Why foot care matters for comfort and mobility
Our feet are our body’s foundation, carrying us through thousands of steps each day. Neglecting them can lead to discomfort, pain, and even mobility issues. A regular, properly executed pedicure is a proactive health measure that goes far beyond aesthetics. It involves carefully trimming nails to prevent painful ingrowns, managing calluses that can cause pressure and pain, and moisturizing skin to prevent cracks and fissures that could become infected.
Consistent foot care helps you spot potential problems early, such as fungal infections or changes in skin and nails that might signal underlying health conditions. By making a health-focused pedicure a part of your routine, you are investing in your long-term comfort, supporting your active lifestyle, and ensuring your feet can continue to carry you wherever you want to go.
Tools and product choices and sustainable alternatives
Building the perfect at-home pedicure kit is the first step. While the market is flooded with gadgets, you only need a few essential, high-quality tools. Investing in durable items not only provides better results but also reduces waste. Here is a look at the essentials and some sustainable alternatives to consider.
| Standard Tool/Product | Sustainable Alternative | Purpose |
|---|---|---|
| Stainless Steel Nail Clippers | Same (Buy once, buy well) | Cleanly and safely trimming toenails. |
| Emery Board Nail File | Glass or Crystal Nail File | More durable, gentle, and can be washed and sanitized. |
| Disposable Cotton Balls/Pads | Reusable Cotton or Bamboo Rounds | Applying nail polish remover; can be washed and reused. |
| Plastic Foot Basin | Your own bathtub or a metal/ceramic bowl | Reduces plastic consumption by using what you already have. |
| Synthetic Pumice Stone | Natural Volcanic Pumice Stone or Terracotta Foot Scrubber | Biodegradable and naturally sourced for exfoliation. |
| Cuticle Trimmers | Orange or Bamboo Wood Stick | Gently pushing back cuticles is safer than cutting. |
| Chemical-based Polish Remover | Soy-based, non-acetone remover | Less harsh on nails and skin, often with a less potent smell. |
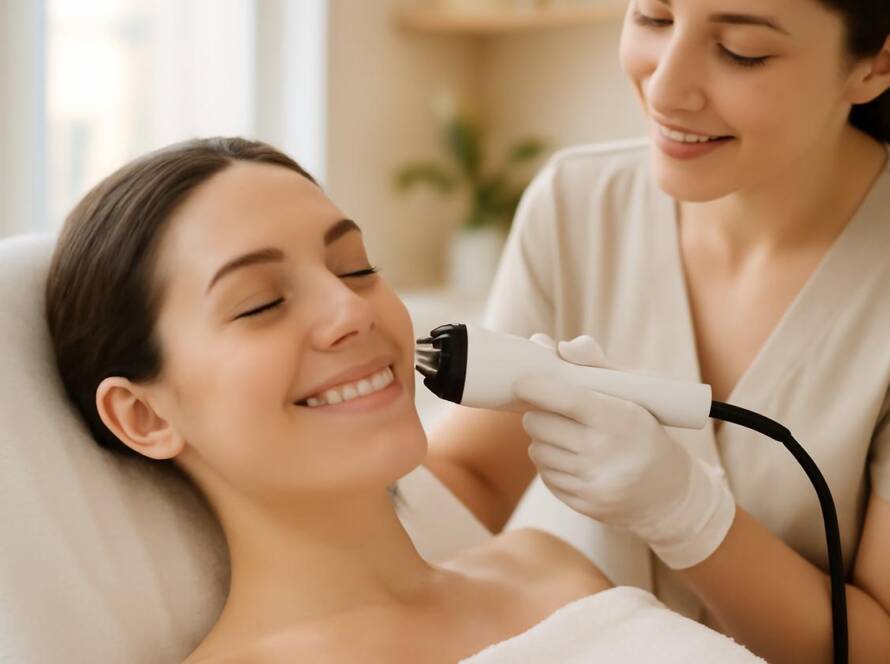
Pre-pedicure prep: soak, exfoliate, and assess
Before you even think about clippers or polish, proper preparation is key to a successful and safe pedicure. This stage is about softening the skin and nails, removing dead skin cells, and taking a moment to check your feet for any issues.
Soaking rituals and safe temperatures
A foot soak is a relaxing ritual that softens tough skin and makes nails easier to trim. However, the temperature is crucial. Always use lukewarm water, never hot. Hot water can strip the skin of its natural oils, leading to dryness, and can be dangerous for individuals with diabetes or nerve damage who may not accurately sense temperature.
- Fill a basin or your tub with enough lukewarm water to cover your ankles.
- Soak for 10 to 15 minutes. Soaking for too long can lead to overly waterlogged skin, making it prone to damage.
- Enhance your soak with a handful of Epsom salts to soothe tired muscles or a few drops of tea tree oil for its natural antiseptic properties.
Exfoliation techniques for different skin types
After soaking and gently patting your feet dry, it is time to exfoliate. The goal is to remove dead, thickened skin, not healthy tissue. Never use sharp implements like razors or graters, as they can easily cause injury and infection. The right method depends on your skin’s needs.
- For mild dryness: A gentle sugar or salt scrub massaged over the feet is often sufficient. You can easily make your own with brown sugar and coconut oil.
- For moderate calluses: Use a natural pumice stone or a foot file on damp (not wet) skin. Work in one direction with gentle pressure. Over-filing can stimulate the skin to grow back even thicker.
- For sensitive skin: Opt for a chemical exfoliant containing ingredients like glycolic or lactic acid. These are often found in foot peel masks or creams and work by dissolving the bonds between dead skin cells without physical scrubbing.
Nail shaping and gentle cuticle care
Proper nail and cuticle care is the cornerstone of a health-focused pedicure and a critical step in preventing common foot problems like ingrown toenails.
First, trim your toenails using a clean, sharp nail clipper. The most important rule, recommended by podiatrists, is to cut nails straight across. Avoid rounding the corners or cutting them too short, as this encourages the nail to grow into the surrounding skin. After trimming, gently smooth any sharp edges with a nail file, again, filing in one direction to prevent splitting.
When it comes to cuticles, less is more. The cuticle is a natural barrier that protects the nail matrix from bacteria. Instead of cutting them, apply a drop of cuticle oil to soften the area. Then, use a wooden orange stick or the soft, rounded end of a metal pusher to gently push them back. This creates a clean look without compromising the health of your nails.
Polish application and long-wear finishing tips
For many, nail polish is the finishing touch of a pedicure. A methodical application ensures a smooth, long-lasting result.
- Prep the Nail Plate: After shaping your nails, take a cotton pad with a bit of nail polish remover and wipe each nail. This removes any natural oils or lotions that could prevent the polish from adhering properly.
- Apply a Base Coat: Never skip the base coat. It protects your natural nail from staining and creates a sticky surface for the color to grip onto.
- Add Two Thin Coats of Color: Apply your chosen polish in thin, even layers. Two thin coats are always better than one thick, goopy one. Allow the first coat to dry for at least two minutes before applying the second. When painting, try the three-stroke method: one down the center, then one on each side.
- Seal with a Top Coat: A good top coat protects the color from chipping, adds shine, and speeds up the drying process. For extra longevity, “cap” the free edge by running the brush along the very tip of your nail.
Consider using polishes that are labeled as “5-free” or higher, meaning they are formulated without common harsh chemicals like formaldehyde, toluene, and DBP.
At-home maintenance: weekly and monthly schedules
A beautiful pedicure is not a one-time event; it is part of an ongoing routine. A simple maintenance schedule for 2025 and beyond will keep your feet in top shape between full pedicure sessions.
- Daily: Moisturize your feet every evening before bed. Pay special attention to your heels. This simple step is the most effective way to prevent dry, cracked skin.
- Weekly: Perform a quick check-in. Lightly file any rough spots with a pumice stone in the shower, gently push back cuticles after moisturizing, and touch up any nail polish chips with a fresh layer of top coat.
- Monthly (or every 3-4 weeks): This is when you perform your full at-home pedicure routine: soak, exfoliate, trim, shape, and polish. Consistent care prevents major issues from developing.
Troubleshooting common foot concerns: dryness, ingrown nails, fungus
Even with regular care, you may encounter common foot issues. Here is how to handle them at home and when to seek help.
- Dryness and Cracked Heels: The solution is intensive moisture. Look for thick foot creams containing ingredients like urea, lactic acid, or salicylic acid, which help exfoliate while they hydrate. Apply generously at night and wear cotton socks to bed to lock in the moisture. For more information on caring for your skin, you can consult resources from the Professional Skin Care experts at the American Academy of Dermatology.
- Ingrown Nails: If you catch one early and it is only mildly red or tender, you can try soaking the foot in warm, salty water for 15 minutes a few times a day. Gently dry the area and wear comfortable, wide-toed shoes. Do not try to “dig out” the nail yourself. If it is very painful, swollen, or shows signs of infection (like pus), it is time to see a professional.
- Fungal Infections: Nail fungus often appears as yellow or white discoloration, thickening, or brittleness of the nail. Athlete’s foot is a fungal skin infection causing itching, redness, and peeling, often between the toes. Over-the-counter antifungal treatments can be effective, but nail fungus in particular can be stubborn. It is best to consult a healthcare provider for a proper diagnosis and treatment plan.
When to consult a health professional
An at-home pedicure is excellent for maintenance, but it is not a substitute for professional medical care. You should consult a podiatrist or your general practitioner if you experience any of the following:
- Signs of infection, such as redness, swelling, pus, or warmth around a nail.
- Persistent or severe pain in your feet or nails.
- An ingrown nail that does not improve or worsens.
- Discolored, thickened, or crumbling nails that could indicate a fungal infection.
- Any foot concerns if you have diabetes, nerve damage, or poor circulation, as these conditions increase the risk of serious complications from minor injuries.
For reliable information on foot health or to find a qualified professional, consider resources like the American Podiatric Medical Association (APMA) or the NHS guide to foot care.
Eco-conscious disposal and product selection
Incorporating sustainability into your pedicure routine is easier than ever. When selecting products, look for brands that use minimal, recyclable packaging and non-toxic, cruelty-free formulas. Opting for reusable tools like a glass nail file and bamboo cuticle sticks significantly reduces waste over time.
Proper disposal is also important. Nail polish is considered household hazardous waste because of its chemical content. Do not throw it in the regular trash or pour it down the drain. Instead, let the bottle air dry completely until the polish hardens, or check with your local waste management facility for their specific disposal guidelines.
Quick recap and a printable pedicure checklist
Performing a regular, health-conscious at-home pedicure is one of the best things you can do for your feet. By focusing on gentle techniques and consistent maintenance, you can prevent problems and keep your feet comfortable and healthy. Use this checklist as your guide for every session.
- [ ] Prep: Gather all your clean tools and products.
- [ ] Soak: Soak feet in lukewarm water with Epsom salts for 10-15 minutes.
- [ ] Dry: Pat feet completely dry, especially between the toes.
- [ ] Exfoliate: Use a scrub or pumice stone to gently remove rough skin.
- [ ] Trim Nails: Cut nails straight across with a clean clipper.
- [ ] File Nails: Smooth edges with a file, moving in one direction.
- [ ] Care for Cuticles: Apply oil and gently push cuticles back with a wooden stick. Do not cut.
- [ ] Moisturize: Massage a rich cream into your feet, ankles, and calves.
- [ ] Prep for Polish: Wipe nails with remover to clean the surface.
- [ ] Polish: Apply one base coat, two thin coats of color, and one top coat.
- [ ] Dry: Allow ample time for polish to dry completely.
By following these steps, you are not just performing a pedicure; you are practicing essential self-care that supports your body from the ground up.